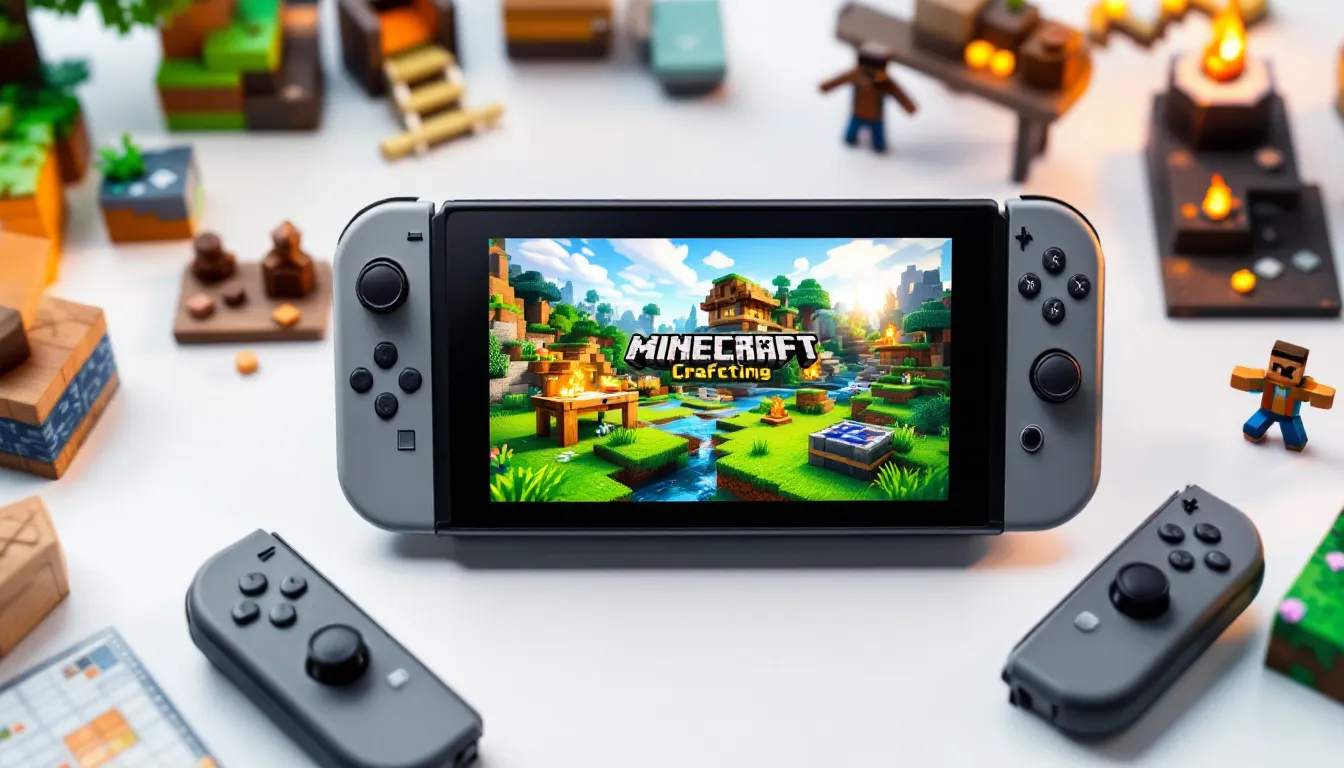
Minecraft on Nintendo Switch has become one of the console’s most beloved titles since its 2017 launch. Whether you’re docking your Switch at home or playing handheld mode during your commute, the game offers an unmatched blend of creative freedom and exploration that works seamlessly across Nintendo’s hybrid platform. The beauty of Minecraft on Switch lies in its accessibility, you don’t need a high-end gaming PC or invest in expensive hardware to experience everything the game has to offer. From casual builders to completionists chasing every achievement, this guide covers everything you need to know to get the most out of Minecraft on Nintendo Switch in 2026, including setup, survival strategies, advanced building techniques, multiplayer options, and troubleshooting solutions.
Table of Contents
ToggleKey Takeaways
- Minecraft on Nintendo Switch offers stable 30 FPS performance in both handheld and docked modes with optimized graphics, making it an accessible entry point for players without high-end gaming hardware.
- Building your first shelter before nightfall—a simple structure with walls, a door, a crafting table, and ideally a bed—is essential to surviving your first playthrough on Switch.
- Split-screen multiplayer with up to four players is one of Minecraft on Switch’s standout features, providing lag-free local cooperation that’s impossible on many other platforms.
- Advanced building techniques like block variety, symmetry, color theory, and terraforming transform basic structures into visually stunning creations that showcase the game’s creative potential.
- Minecraft on Switch runs Bedrock Edition, which prioritizes stability and cross-platform compatibility over modding freedom, but still supports texture packs and behavior packs through the official marketplace.
- Regularly backing up your worlds prevents catastrophic losses, and reducing render distance or disabling complex redstone circuits can resolve frame rate drops and performance lag.
What Makes Minecraft On Nintendo Switch Unique
Performance and Graphics Differences
Minecraft on Nintendo Switch runs on Bedrock Edition, not Java Edition, which significantly affects performance and visuals. The Switch version targets 30 FPS in handheld mode and 30 FPS docked (with frame pacing improvements in later updates). While this isn’t the 60+ FPS you’d get on PC, the 30 FPS cap remains stable on most modern maps, making for a consistently seamless process.
Graphically, the Switch version supports most modern features introduced after the Bedrock Edition launched, think improved water rendering, enhanced particle effects, and better shadow quality. But, the resolution scales: you get 720p handheld and up to 1080p docked (depending on your Switch model). These aren’t eye-watering differences from Java Edition, but they’re noticeable if you’ve played both versions side-by-side. Larger render distances available on PC are capped at 12-14 chunks on Switch, reducing pop-in but keeping the world feeling spacious enough.
One standout advantage: the Switch version automatically handles many optimization tweaks behind the scenes. You won’t spend hours tinkering with launcher settings like Java players sometimes do. What you see is what you get, optimized for the hardware out of the box.
Portability and Handheld Advantages
The Nintendo Switch’s portability transforms how you play Minecraft. Want to build your castle on the bus? Play survival mode while waiting for an appointment? The Switch makes that possible in ways PC and console-exclusive platforms can’t match. The Joy-Con controllers feel intuitive for block placement and mining once you get past the initial learning curve, though some players prefer a Pro Controller for longer sessions.
Handheld mode also introduces a unique social element. Playing docked during local multiplayer sessions feels different from split-screen cooperation where you’re literally sitting beside someone with a Joy-Con each. Split-screen multiplayer on Switch is genuinely responsive, not something that always works flawlessly on all platforms. You and a friend can work on the same world without lag concerns that plague online play.
Battery life remains a consideration. Depending on your Switch model, expect 4-6 hours of continuous Minecraft play before needing a charge. That’s plenty for afternoon gaming sessions but matters if you’re planning a long travel day. The Switch Lite offers marginally better battery efficiency, though at the cost of TV docking capability.
Getting Started: Installation and Initial Setup
Purchasing and Downloading the Game
Minecraft on Nintendo Switch costs $19.99 USD on the eShop as of 2026 (occasionally discounted during sales events). You’ll need a Nintendo Switch console, a Nintendo Account, and an internet connection to download, though after the initial download, you can play offline indefinitely.
From the eShop, search for “Minecraft” and select the version with the Mojang Studios logo. Hit “Download” and be patient, the full install is roughly 1.5-2 GB depending on your Switch model and storage. If you have the internal storage space, great: otherwise, a microSD card (at least 256 GB is recommended for multiple games) keeps your library manageable.
Once downloaded, launch the game and you’ll be prompted to sign in with your Microsoft Account. If you don’t have one, create it, this links your Switch progress to your account and enables online features like Realm servers and online multiplayer. The setup process is straightforward and usually takes fewer than five minutes.
For those wanting to share Minecraft with family members on the same console, the game supports multiple Switch accounts out of the box. Each player has their own save slots and progress.
Creating Your First World
After signing in, you’ll see the main menu. Tap “Play” and you’re greeted with world creation options. Here’s where new players sometimes get overwhelmed, but the defaults work fine for beginners.
Start with Survival Mode on Normal difficulty. This balances challenge with forgiveness: mobs spawn and can harm you, but you won’t die in one hit from most encounters. The game won’t delete your world if you die (unlike Hardcore Mode on Java), letting you learn by trial and error.
For world type, select “Old” (default terrain generation) unless you want experimental features. Seed is optional, seeds let you recreate specific worlds, but for your first playthrough, leave it random. The game will generate a unique world just for you.
Once you hit “Create,” the world generates and you spawn at a random location. Your first few minutes matter: take stock of your surroundings, identify nearby trees, and note water sources. These become your first priority.
Essential Building and Survival Tips for Beginners
Gathering Resources Efficiently
Your first goal: punch trees. It sounds silly, but it’s the foundation of Minecraft. Hold the attack button while facing a tree trunk until wood blocks pop out. Collect roughly 10-15 wood blocks before doing anything else.
Once you have wood, open your crafting menu (Y button on Switch) and convert wood into Planks by placing wood in the crafting grid. With planks, craft a Crafting Table, this is essential for every survival playthrough. Place it on the ground (hold the block and place it with ZR) and use it to craft more complex items.
Next: make basic tools. Craft a Wooden Pickaxe (three planks in an upside-down T-shape with two sticks below). This pickaxe is weak but lets you mine Stone, which spawns underground or as exposed patches on hillsides. Mine stone and craft a Stone Pickaxe, a massive upgrade in durability and speed.
With stone tools, find iron ore (dark gray ore with lighter speckles) and mine it with your stone pickaxe. You need at least 3 iron ore blocks to make a basic iron pickaxe, which opens access to diamonds and other precious materials. Iron remains the most important mid-game resource.
Early-game resource gathering rule: go vertical. Mine downward in a staircase pattern (create downward diagonal steps as you dig) rather than tunneling horizontally. Staircase mining exposes more ore veins and reduces chances of accidentally hitting lava. Always keep water or milk buckets nearby, lava is a constant hazard underground.
Building Your First Shelter
Before night falls (about 10-15 minutes of playtime), you need shelter. Mobs spawn at night, and without walls, you’ll take damage. Your first shelter doesn’t need to be fancy, a 5×5 room made of dirt or wood blocks, a door, and a roof suffices.
Here’s the minimum setup:
- Build four walls by stacking blocks (hold a block and place it using ZR: stack them vertically).
- Add a roof (place blocks on top to completely seal the structure).
- Carve out a doorway and place a Door block in it (craft from six planks).
- Add a Crafting Table and Furnace inside (craft furnace from eight stone blocks in a square pattern with the center empty).
- Optional but helpful: place a Bed (craft from three wool blocks and three planks) inside. Beds let you skip night entirely by right-clicking them.
The furnace is crucial. It smelts raw materials into usable items, iron ore becomes iron ingots, logs become charcoal (used for smelting other materials). Charcoal also works as fuel for torches, eliminating early-game darkness.
Navigating Your First Night
Night lasts about 7-8 minutes of real time. If you’re inside a sealed shelter with a bed, hit the bed with ZR and you’ll skip to morning instantly. If you don’t have a bed, stay indoors, don’t open the door, and wait.
Use night-time indoors productively: cook food in your furnace, craft tools, plan your next day. Food is critical, kill animals (hit sheep, cows, pigs with a sword) to get raw meat, cook it in your furnace to get cooked meat, and eat it to restore health. Your hunger bar depletes from running and jumping: keeping food in your inventory prevents unexpected deaths.
If you’re caught outside at night without shelter: build a temporary box around yourself. Quickly stack blocks upward and inward, creating a sealed space. It’s ugly, but it keeps mobs out while you wait for dawn. Never fight mobs when you’re low on health or haven’t equipped armor yet, retreat, heal, and engage when ready.
Key survival rule: always carry a bed, food, and tools. If you die, you drop all items and respawn at your world spawn (or bed, if you slept there). Respawning miles from your items often means losing everything unless you find them before they disappear (items despawn after 5 minutes).
Advanced Building Techniques and Creative Strategies
Architectural Design Principles
Once you’ve survived and gathered decent resources, building becomes the game’s core appeal. Advanced builders on Switch use principles that translate beautifully from concept to reality:
Symmetry and Balance create visual harmony. Design building facades with matching left and right sides. This doesn’t mean rigid and boring, asymmetrical details add character, but the overall structure should feel balanced.
Block Variety prevents sameness. A house built entirely from wood looks flat and uninspired. Mix wood planks with stone, stairs, slabs, and other textures. Stairs and slabs (half-height blocks) are underrated, they add depth and detail that full blocks can’t achieve. Use them for trim, rooflines, and architectural accents.
Color Theory matters even in Minecraft’s blocky aesthetic. Warm blocks (wood, terracotta, sand) pair naturally with cool blocks (stone, deepslate, prismarine). Avoid chaotic color combinations, pick a palette of 3-4 primary block types and build within that constraint.
Lighting Design transforms mood and functionality. Torches prevent mob spawning but look crude. Lanterns, campfires, and soul lanterns feel more sophisticated. Placed strategically, lighting guides players through your build and highlights focal points.
For inspiration, study real-world architecture. No need to copy exactly, extract principles. How do real buildings use roof overhangs, windows, doors, and decoration? Translate those ideas into blocks.
Terraforming and Landscape Modification
Terraforming, reshaping the terrain around your builds, separates mundane structures from stunning ones. Here’s where patience becomes a virtue:
Mountain Building: Create rolling hills by slowly stacking blocks upward in a natural slope. Use grass blocks at the surface and stone, dirt, or deepslate as you build upward. Vary the height rather than creating straight walls, nature isn’t uniform. Plant trees, add waterfalls, and carve caves into mountains for realism.
Water Features: Dig shallow channels for rivers, create ponds by digging downward and letting water fill the cavity. Terracotta, concrete, and stone slabs lining water features make them feel intentional rather than accidental. Waterfalls add drama, dam them with a 2-3 block drop for visual impact.
Pathways: Rather than flat ground between buildings, create sunken or raised walkways using stairs and slabs. Cobblestone, gravel, and dirt paths feel organic. Lanterns or torches lining paths add navigation and atmosphere.
Ground Texture: The flat grass your world spawns with gets boring fast. Break it up with gravel patches, bare dirt, stone outcrops, and flowers. Small details accumulate into a landscape that feels lived-in rather than sterile.
Terraforming on Switch is tedious, moving individual blocks is slow. Use efficiency tricks: equip a Shovel to dig dirt and grass faster, use TNT for bulk terrain removal (light it with flint and steel and take cover), and plan your terraforming before you start so you don’t redo work.
Creating Efficient Farms and Automation
Farms and automation systems are where Minecraft’s mechanical side shines. Even on Switch, basic automation is achievable:
Basic Farms: Plant crops (wheat, carrots, potatoes) in rows with water channels running adjacent to them. Water hydrates farmland up to four blocks away, so a single water channel irrigates up to nine rows. Bonemeal (crafted from bones dropped by skeletons) instantly grows crops to harvest-ready, use it to speed up farming.
Animal Farms: Build an enclosed pen, lead animals inside with their favorite foods (cows and sheep eat grass), and breed them by right-clicking pairs with wheat. They multiply and drop meat and materials when killed. Automated animal farms using hoppers and dispensers are possible but complex on Switch.
Mob Farms: Advanced players build grinders that trap mobs and kill them automatically, farming drops without lifting a finger. These require redstone circuits, functional but intricate. For beginners, focus on simpler farms.
Redstone Basics: Redstone is Minecraft’s wiring system. A Redstone Lamp turns on when redstone power reaches it. Repeaters and Comparators extend redstone signals and create timers. A simple redstone farm might use a repeater to pulse a dispenser every few seconds, distributing bonemeal across crops.
Farms feel rewarding because they’re semi-passive income, set them up and they work while you do other things. They’re especially valuable in survival mode where food and experience are always needed. Nintendo Switch Strategies covers optimization techniques that apply to farm designs as well.
Multiplayer and Social Features On Nintendo Switch
Local Multiplayer and Split-Screen Gaming
Split-screen multiplayer on Nintendo Switch remains one of the platform’s best-kept secrets. Up to four players can play on a single Switch simultaneously, each with a Joy-Con or Pro Controller. It’s legitimately responsive and doesn’t suffer from the lag issues that plague some console ports.
Here’s how it works: Launch Minecraft, select your world, and at the main menu, pause the game and hit “Settings.” Scroll to “Multiplayer” and enable “Show Friend Invites.” Back in the world, you can invite other players on the same console, each gets their own camera view on a divided screen. The screen splits in half or quarters depending on player count.
Split-screen cooperation is where Minecraft shines socially. Building alongside a friend in real-time beats explaining via voice chat. You see their cursor, watch their builds develop, and collaborate on structures. Survival mode adds urgency, two players defending against mobs is more fun than solo grinding.
One limitation: split-screen worlds are limited to one world at a time. You can’t access online multiplayer or Realms while in split-screen. The tradeoff is acceptable since local multiplayer offers immediate, lag-free gameplay.
Online Multiplayer and Realm Servers
Online multiplayer opens the door to playing with friends remotely. Two options exist:
Realm Servers are Microsoft-hosted private servers tied to your account. Minecraft Realms costs roughly $8/month and supports up to 10 players simultaneously (though the subscription covers multiple Realms). Realms are the easiest way to play with distant friends, add them to your Realm, give them a code, and they join whenever. The server is persistent: even if you’re offline, time advances and mobs spawn naturally.
Realms shine because Microsoft handles hosting. No complex port-forwarding, no server crashes you have to troubleshoot. Invite friends, build together, and let the system handle logistics. For casual players wanting stress-free multiplayer, Realms is worth the subscription.
Online Multiplayer (via Xbox Live) lets you join friend’s worlds directly if they’re playing, but the host must be online. One player acts as the server, if they disconnect, everyone gets kicked. This works fine for quick co-op sessions but isn’t ideal for persistent long-term play.
Both options require an active internet connection. Cross-platform play is supported, Switch players can game with PC (Bedrock Edition), Xbox, and mobile players, expanding your friend pool beyond Nintendo’s ecosystem.
Community servers and custom realm worlds let you experience pre-built maps, mini-games, and adventure maps created by other players. Browse the in-game marketplace for curated content or join community-run servers if you want structured gameplay beyond vanilla survival.
Common Issues, Troubleshooting, and Performance Optimization
Lag and Frame Rate Problems
While Minecraft on Switch runs at a stable 30 FPS in ideal conditions, certain situations cause stuttering:
Render Distance: Reducing render distance (the distance at which terrain renders around you) helps. Settings > Video > Render Distance. Lower values decrease visual range but improve frame stability. Try 12 chunks if you experience frequent dips.
Large Builds and Redstone: Massive structures with complex redstone machines can cause lag. Redstone is CPU-intensive: too many active repeaters or comparators simultaneously will tank performance. Disable/separate active redstone circuits and test to identify the culprit.
Chunk Loading: Minecraft loads chunks (16×16 block areas) as you move. Large worlds with extensive exploration can bog down loading times. This is unavoidable on Switch, but fast travel via Nether portals (links between dimensions) or Teleporting (available in Creative mode or with commands) mitigates traversal lag.
Memory Issues: Check your Switch’s storage. If you’re running critically low on space, performance degrades. Aim to keep at least 2-3 GB free by removing unused games or clearing cache.
Most performance issues resolve by reducing visual effects (animations, particle density) in settings. Yes, it’s less pretty, but smooth gameplay matters more than flashy visuals.
Storage and Save File Management
Minecraft worlds can grow large, a fully explored main world plus the Nether and End dimensions can consume 500 MB to 1+ GB depending on how much you’ve built and generated.
Backup Worlds: Switch doesn’t have native world backups. Export worlds by opening the world, pausing, selecting “World Settings,” and choosing “Backup This World.” This creates a copy you can restore if something goes wrong (accidental deletion, corruption, etc.). Make backups before major building projects.
World Management: The main menu shows all your worlds. Delete unused ones to free space. Worlds are saved locally by default: if you lose your Switch, local saves are gone unless you backed them up to cloud storage or exported them.
Realm Backups: If you’re using a Realm, your worlds are backed up automatically by Microsoft. You can restore previous versions via the Realm settings, invaluable if griefing occurs or you accidentally overwrite something important.
Local Save Storage: Save files live on your Switch’s internal storage. microSD cards only store game installers, not save data. If your microSD corrupts, your Minecraft progress remains safe on the internal drive.
Regularly backing up important worlds takes seconds and prevents rage-inducing losses. Make it a habit.
Minecraft Switch Versions: Bedrock Edition vs. Java
Minecraft on Nintendo Switch runs Bedrock Edition, not Java Edition. Understanding the differences matters if you’ve played Java or plan to play across platforms.
Bedrock Edition is the unified version across console, mobile, and Windows. It emphasizes consistency and cross-platform play, you can play with friends on Xbox, PlayStation (as of 2022), PC, or mobile seamlessly. Updates arrive simultaneously across all platforms, keeping the meta and content synchronized.
Java Edition (PC-only) allows mods, custom servers, and deeper technical manipulation. The modding ecosystem is vastly larger: mods like Sodium (performance enhancement) or Optifine (graphical improvements) don’t exist on Bedrock. Java is less polished graphically but offers unmatched customization.
On Switch, you’re locked into Bedrock’s closed ecosystem. No mods, no custom servers (only official Realms), no third-party server connections. What you gain: stability, guaranteed updates, and cross-platform compatibility. What you lose: modding freedom and technical flexibility.
Gameplay Differences: Redstone behaves slightly differently between versions, Java’s technical complexity differs from Bedrock’s simpler systems. Redstone doors, flying machines, and contraptions that work on Java might not on Switch. Hunger mechanics, crop growth, and mob behavior align between versions, but subtle differences exist.
For casual players, these differences barely matter. You’ll build, explore, and survive identically. For technical players aiming to replicate complex contraptions from Java tutorials, expect frustration, solutions often don’t port directly.
Achievements vs. Advancements: Java uses “Advancements” (progression goals shown as a tree), while Bedrock uses “Achievements” (single-trigger rewards). Bedrock achievements feel more arcade-like: Advancements tell a narrative progression. If you’re chasing completionist goals, Bedrock’s achievement system is simpler but less rewarding.
Switch players shouldn’t feel disadvantaged. Bedrock Edition runs great on Switch and covers 95% of what makes Minecraft compelling. Mods are nice, but vanilla Minecraft remains endlessly engaging. Compare options thoughtfully if you’re considering multiple platforms, but for pure enjoyment, Switch Bedrock delivers.
Best Mods, Texture Packs, and Customization Options
While Nintendo Switch doesn’t support traditional mods like PC Java Edition, customization isn’t completely locked. Here’s what’s available:
Texture Packs: Official texture packs (graphical overhauls) are available through the in-game marketplace. Packs range from free to a few dollars. Popular options include Vanilla Tweaks (polished vanilla aesthetic), Programmer Art (nostalgic retro feel), and High Resolution packs (crisper textures if your Switch can handle slightly higher visual overhead). Texture packs swap block appearances without changing functionality, purely cosmetic.
Behavior Packs: Behavior packs modify game mechanics in subtle ways, adjust mob drops, change recipe requirements, or alter difficulty settings. Many are free through the marketplace. These don’t require Realms: you apply them when creating a world.
Resource Packs: Similar to texture packs, resource packs bundle textures, models, and sounds. The marketplace offers licensed packs tied to other franchises (crossovers with The Legend of Zelda, Minecraft Education Edition content, etc.). Quality varies, some feel polished, others feel slapped-together.
Marketplace vs. Free Options: The official marketplace is curated by Microsoft and paid creators. Free community-created content exists but is harder to discover on Switch. You’re primarily shopping within the marketplace unless you have contacts sharing packs outside the official ecosystem.
Command Blocks and Commands: If you enable cheats in world settings, you can use command blocks to create custom game mechanics. Commands like /give (spawn items), /setblock (place blocks remotely), and /kill (eliminate entities) allow creative automation. This requires command knowledge, it’s programming-lite. New players shouldn’t worry about this: it’s an advanced tool for creators.
Creative Mode Customization: Creative mode lets you build without resource constraints, fly freely, and access all blocks. No mods needed, Creative Mode is the ultimate sandbox. Use it to prototype builds before attempting them in survival, or just build for pure creative satisfaction.
The lack of traditional modding is Switch’s tradeoff for simplicity and stability. You get solid vanilla Minecraft with optional visual enhancements, enough for most players. If deep modding is your priority, PC Java Edition remains the ultimate platform. For console players, Switch’s customization options strike a fair balance.
Conclusion
Minecraft on Nintendo Switch remains one of the console’s finest titles years after launch. Whether you’re a first-time builder or a seasoned player, the Switch version delivers the core Minecraft experience, exploration, survival, and creative expression, without compromising performance or accessibility.
Your journey begins with the basics: gather wood, craft tools, build shelter, and survive your first night. From there, the game opens infinitely. Build elaborate castles, master redstone automation, collaborate with friends in split-screen or Realms, and continuously push your architectural ambitions higher. The 30 FPS cap and render distance limitations pale against the freedom to play Minecraft anywhere, handheld on a train, docked on your TV, split-screen with friends on your couch.
Referencing top Nintendo Switch games reinforces that Minecraft isn’t just a novelty port, it’s a legitimate, full-featured version that stands alongside any platform release. Performance is stable, content updates arrive regularly, and the multiplayer features (especially local split-screen) offer experiences unique to Switch.
Expect to sink hundreds of hours into Minecraft on Switch if you embrace it fully. Start small, build gradually, and don’t rush. The joy isn’t in finishing, there’s no ending. It’s in the journey: discovering a beautiful landscape, designing your perfect base, or helping a friend survive their first night. That’s what keeps Minecraft alive across platforms and generations.
Immerse, place some blocks, and enjoy the adventure.